Building an inground pool is one of the best decisions you can make for your home. But the construction process can feel confusing if you have never done it before.
I have helped many homeowners work through this exact problem. Trust me, the right information makes everything easier.
In this blog, you will find everything you need. We cover planning, budgeting, permits, plumbing, finishes, common mistakes, and tips to keep your project on track.
No confusing terms. No fluff. Just clear, honest guidance you can actually use.
By the end, you will feel ready to move forward with confidence.
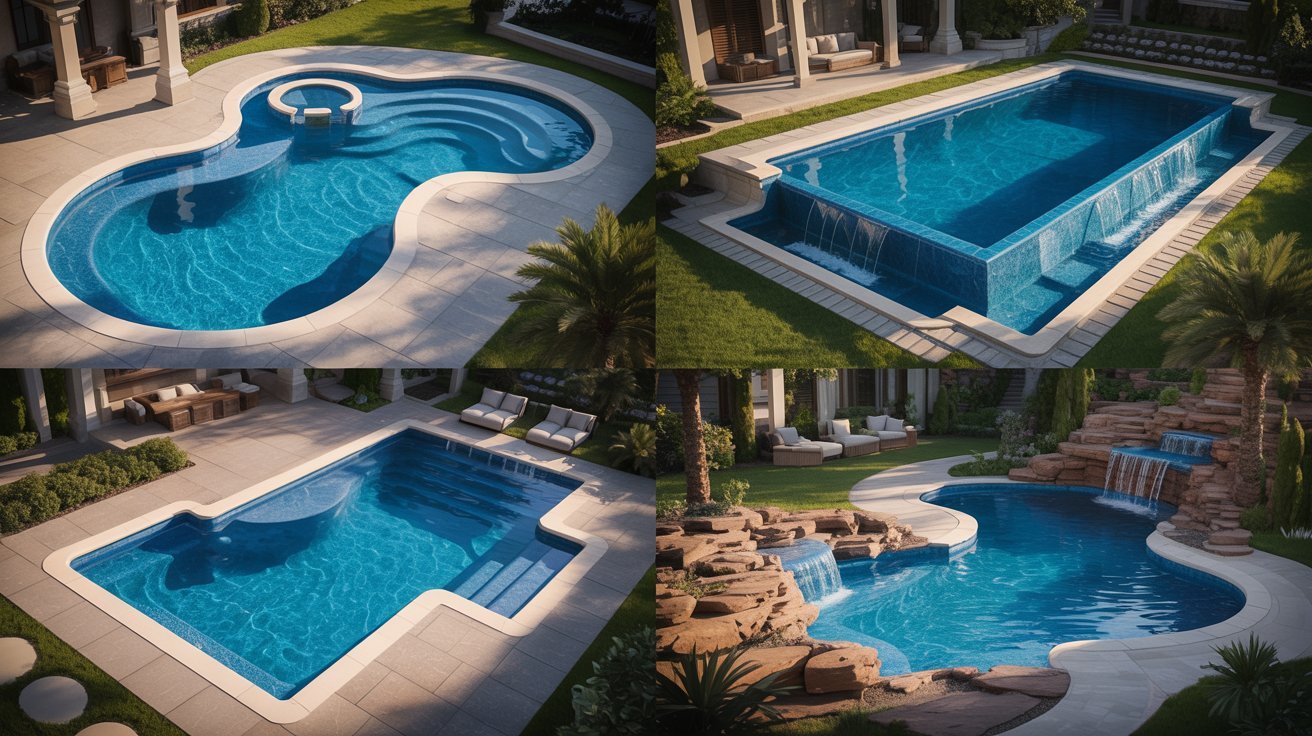
What Is Inground Pool Construction?
Building a pool into the ground is a step by step process that turns an empty yard into a lasting water space.
Inground pool construction means building a pool below the surface of your yard. It is a permanent structure, not something you can move or take down.
The process includes digging, shaping, and building the pool shell. Then plumbing, electrical work, and interior finishing are done. Finally, decking is added and the water is tested before use.
It takes a few weeks to a few months depending on size and materials.
Planning Your Inground Pool Project
Good planning makes the difference between a smooth build and a costly mess.
Choosing Pool Size and Design
Start by measuring your available space.
Think about how you will use the pool: laps, play, or relaxing.
Match the shape and depth to your needs and budget. Finish options like plaster or tile vary in cost, so choose what you can maintain long term.
DIY vs Hiring a Pool Contractor
DIY saves money but demands real construction skills. Most homeowners are better off hiring a licensed contractor.
They handle permits, plumbing, and scheduling. Always get three quotes and check references before signing anything.
Budgeting and Permit Requirements
Inground pools typically cost between $35,000 and $65,000. Add extras like heating and fencing to your estimate. Keep a 10 to 15 percent buffer for surprises.
Permits are required in most areas, so check with your local building department early. If you have an HOA, get written approval before you start.
Step by Step Inground Pool Construction Process
Building an inground pool takes careful planning and several key stages to get right.
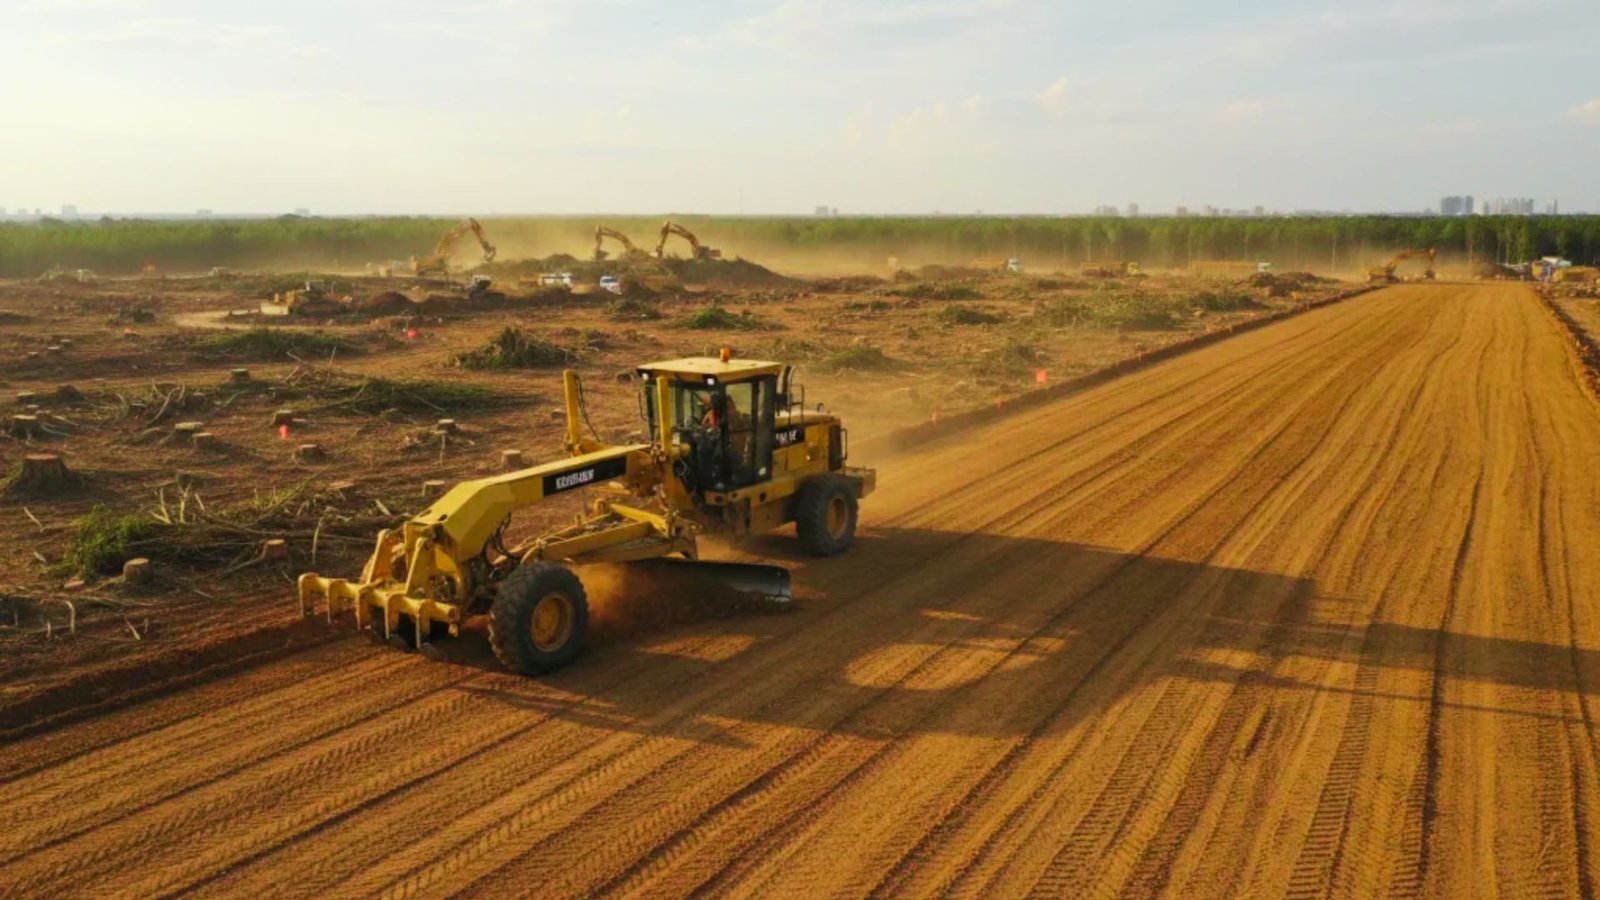
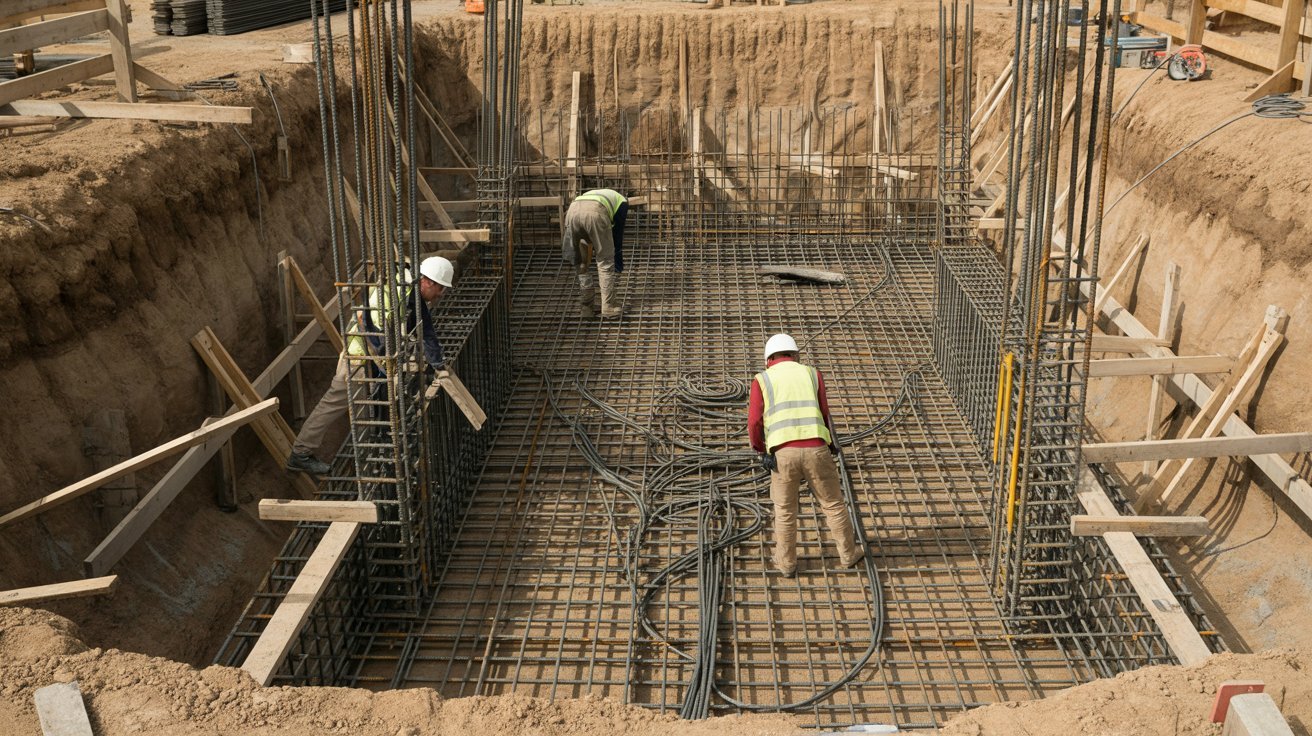
Step 1: Site Marking and Excavation
Before any digging begins, the crew marks out the exact shape and size of the pool on the ground. They use stakes and spray paint to outline the area clearly.
Once the layout is approved, heavy machinery moves in to dig out the earth. The depth varies based on the pool design. Crews also check for underground utilities before they start.
This step sets the foundation for everything that follows.
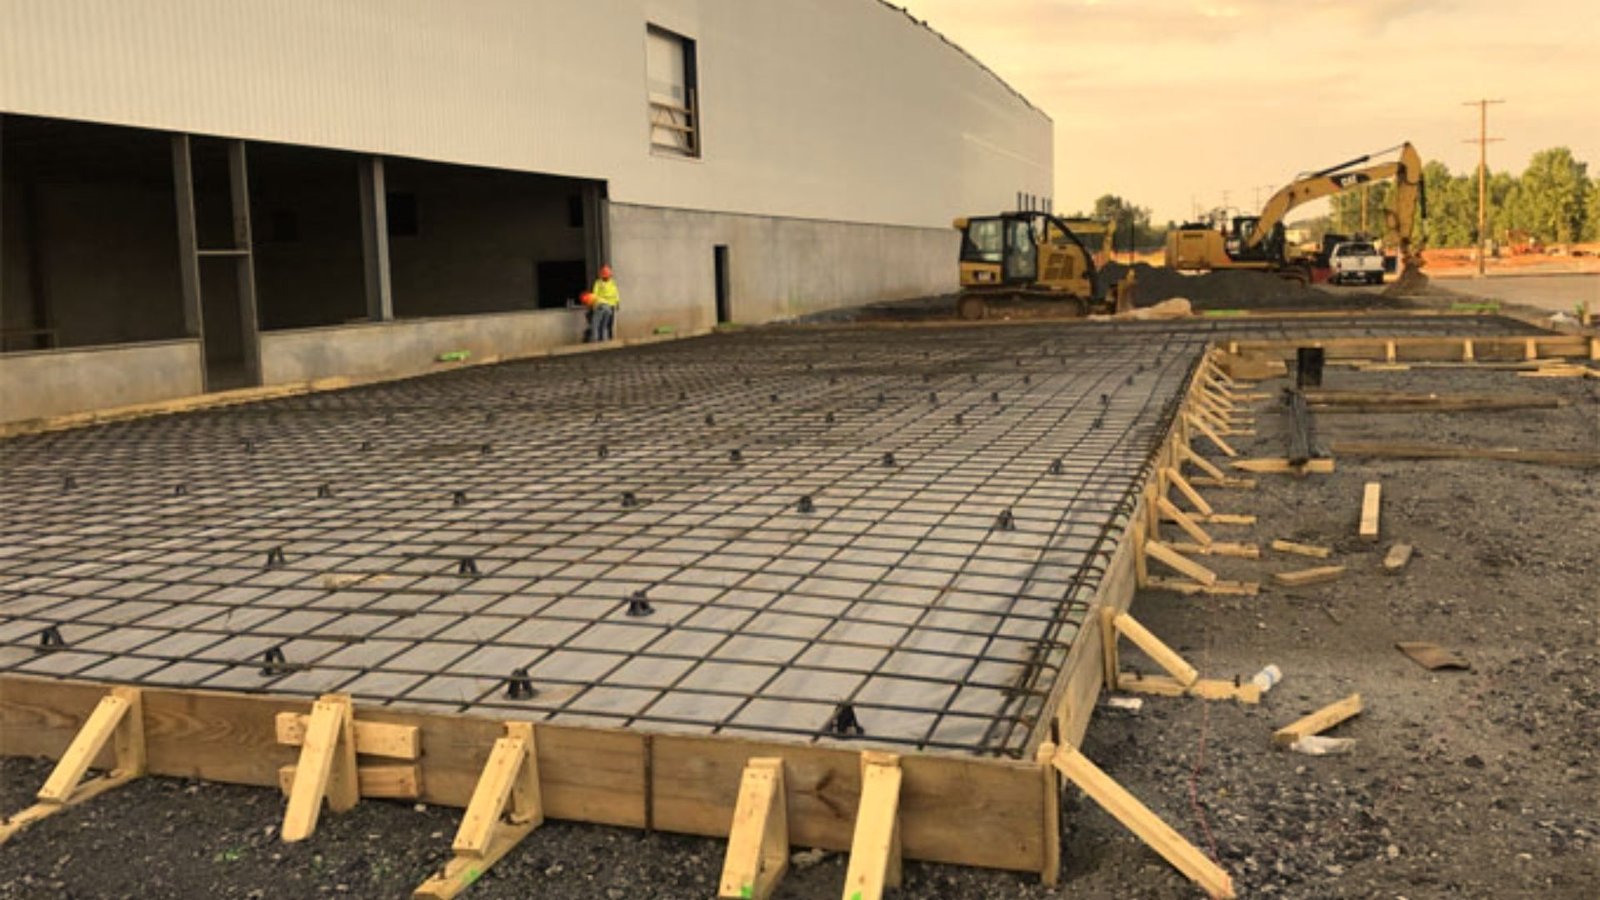
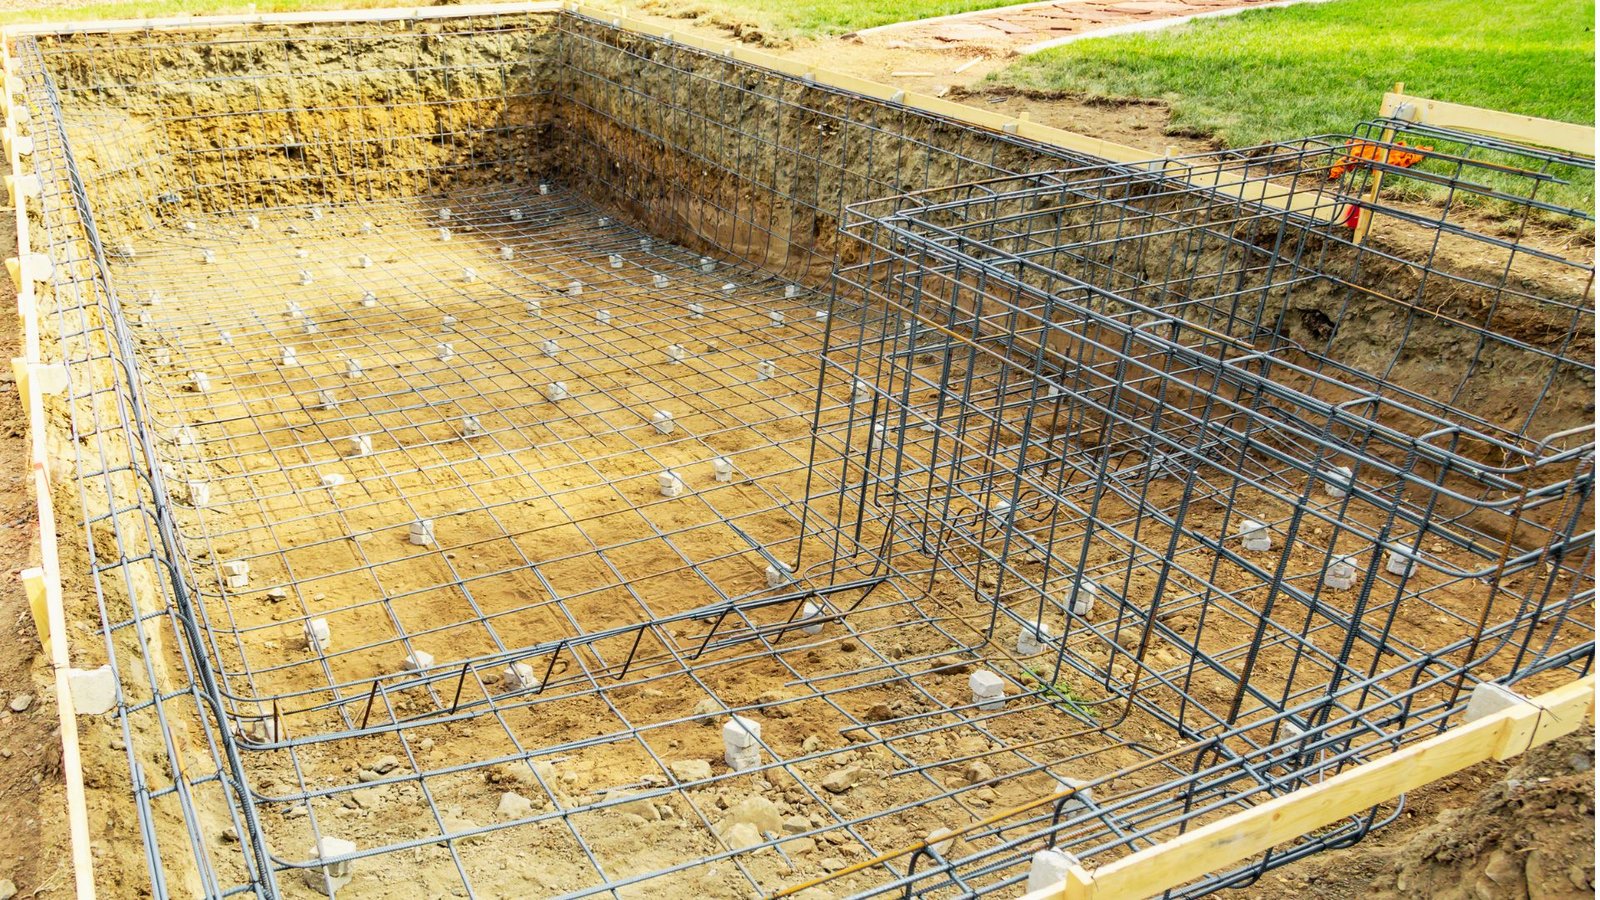
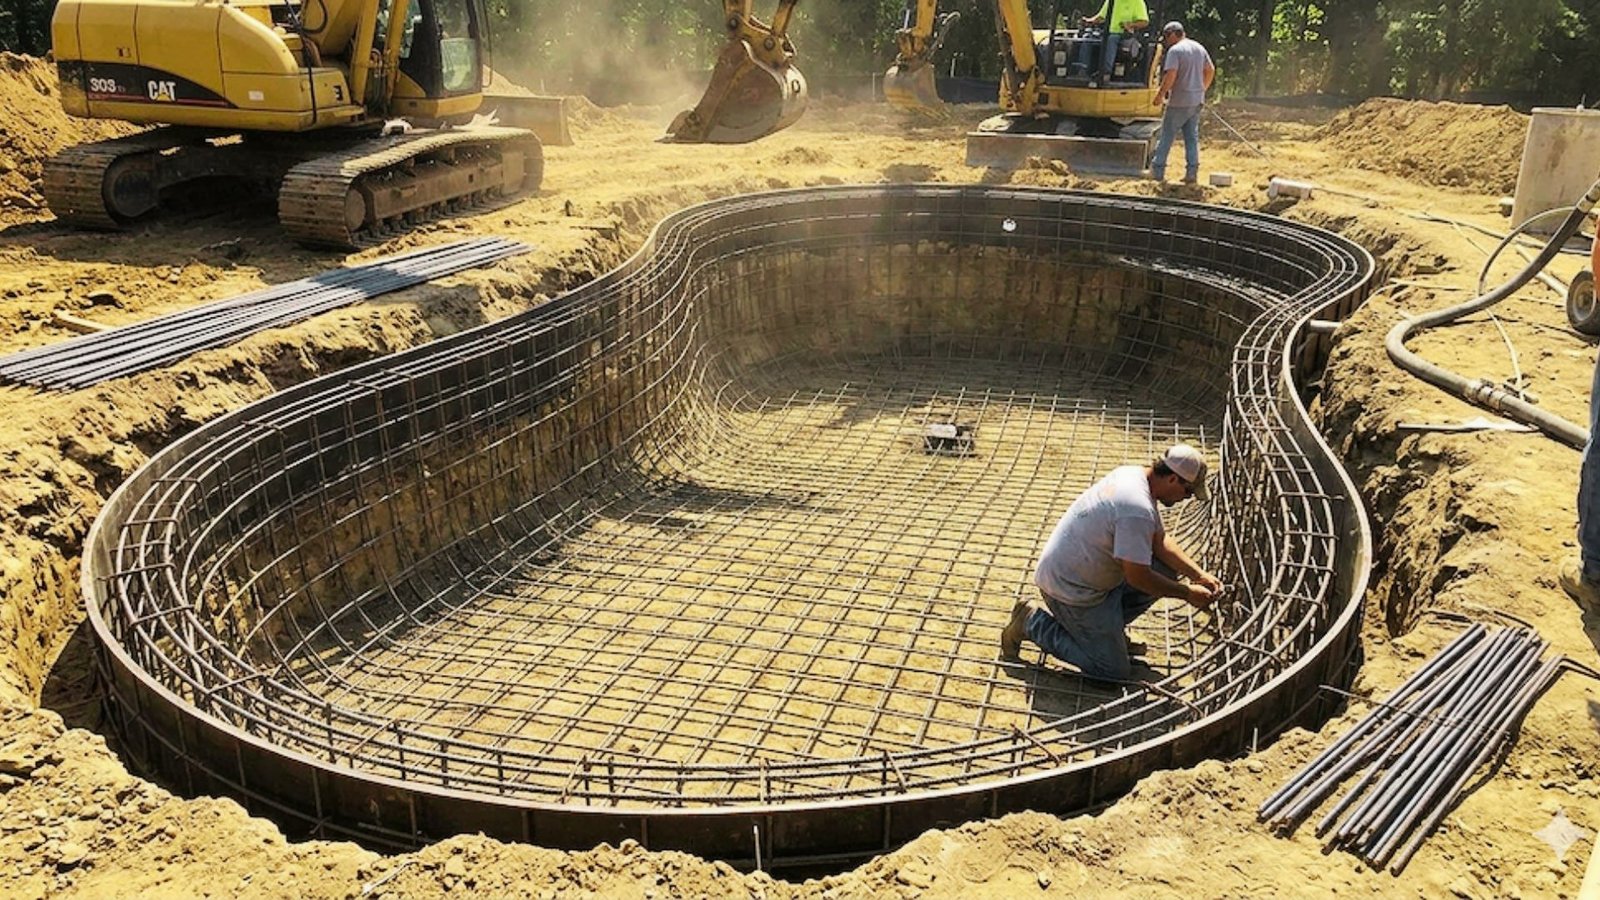
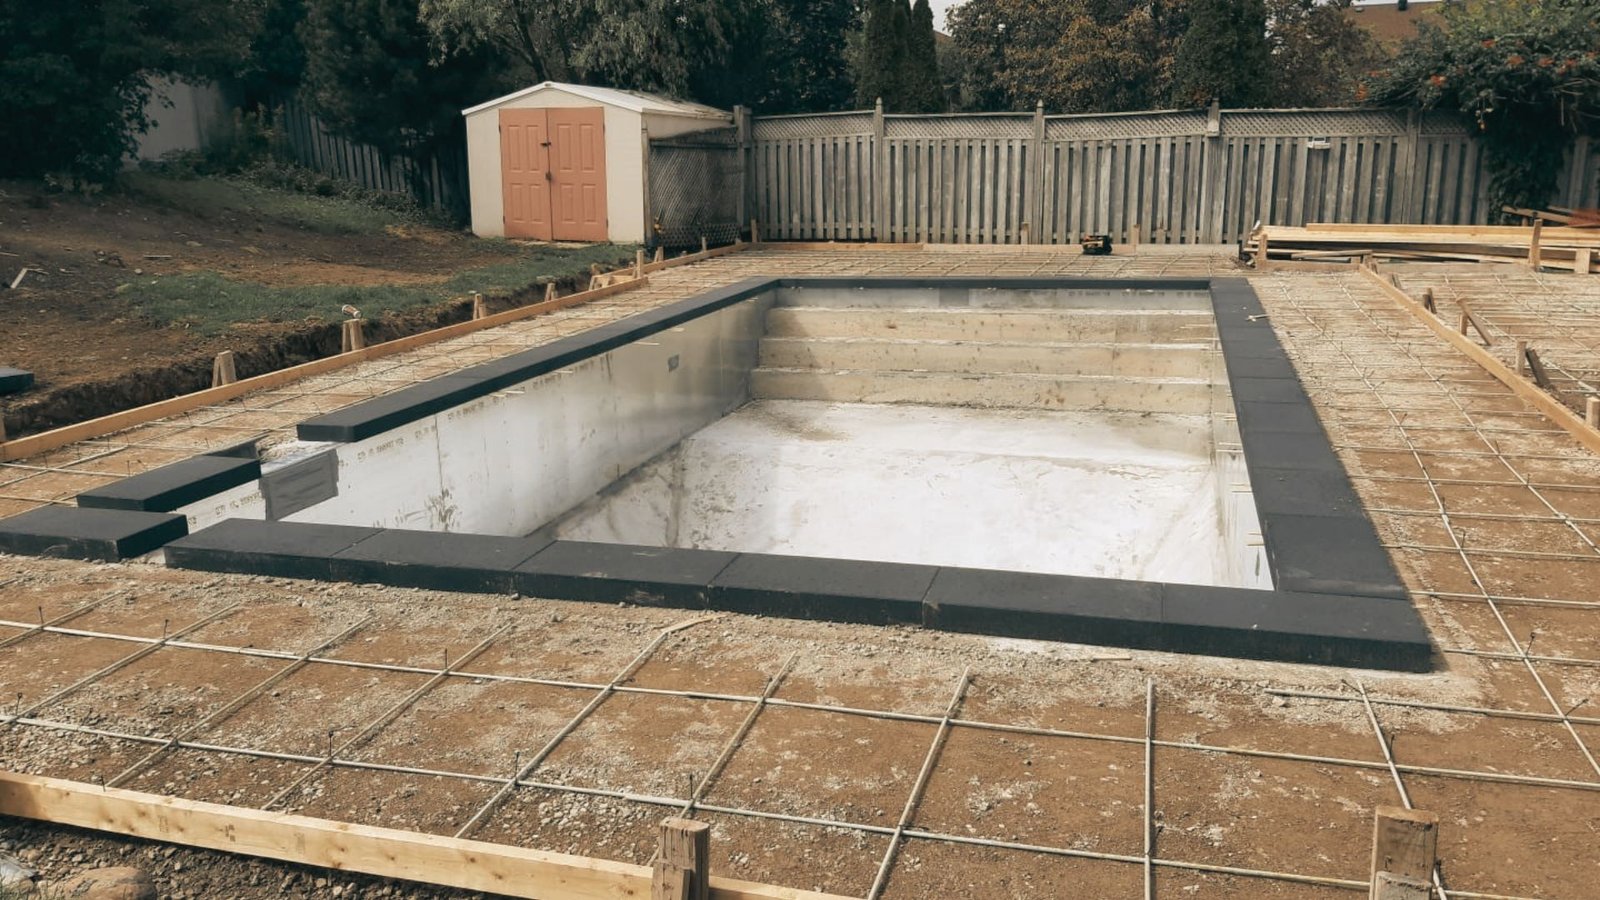
Step 2: Installing Rebar and Pool Walls
After excavation, workers place a grid of steel rebar throughout the pool shell. This steel framework gives the pool its strength and helps it hold its shape over time.
The rebar is tied together at precise intervals. Wall panels may also be installed at this stage, depending on the construction method.
Getting this step right is critical because the structure needs to last for decades.
Step 3: Gunite or Concrete Application
With the rebar in place, crews spray gunite or shotcrete over the steel framework. This high pressure concrete mixture bonds tightly to the rebar and forms the solid shell of the pool.
Workers smooth and shape the surface while the material is still workable. It then needs several days to cure properly before the next phase begins.
This layer is what gives the pool its durability.
Step 4: Plumbing and Electrical Installation
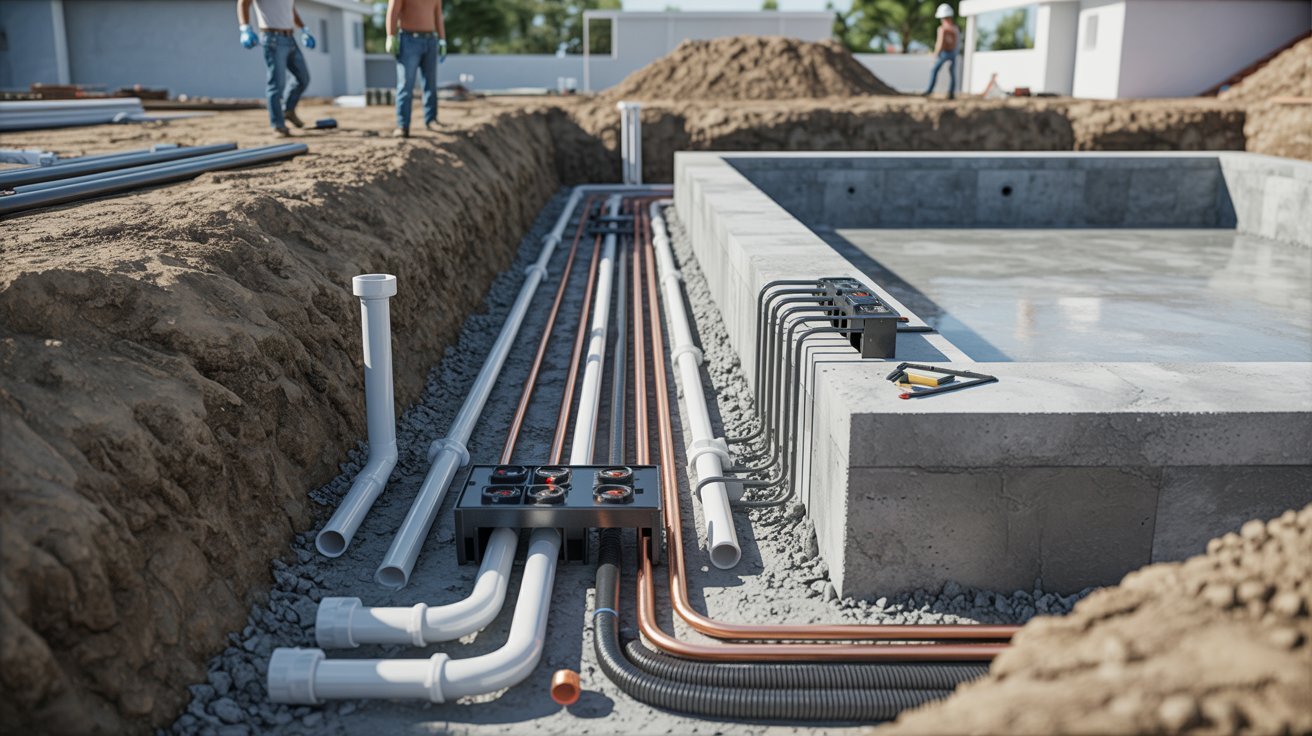
” width=”300″ height=”168″ class=”alignnone size-medium wp-image-40″ />
Once the shell is set, licensed plumbers and electricians get to work. They install pipes for the filtration system, drains, return lines, and any water features you have chosen.
Electrical work covers lighting, pumps, and control systems. All wiring and pipes must meet local codes before the project can move forward.
This phase is behind the scenes, but it powers everything in the pool.
Step 5: Applying Interior Pool Finishes
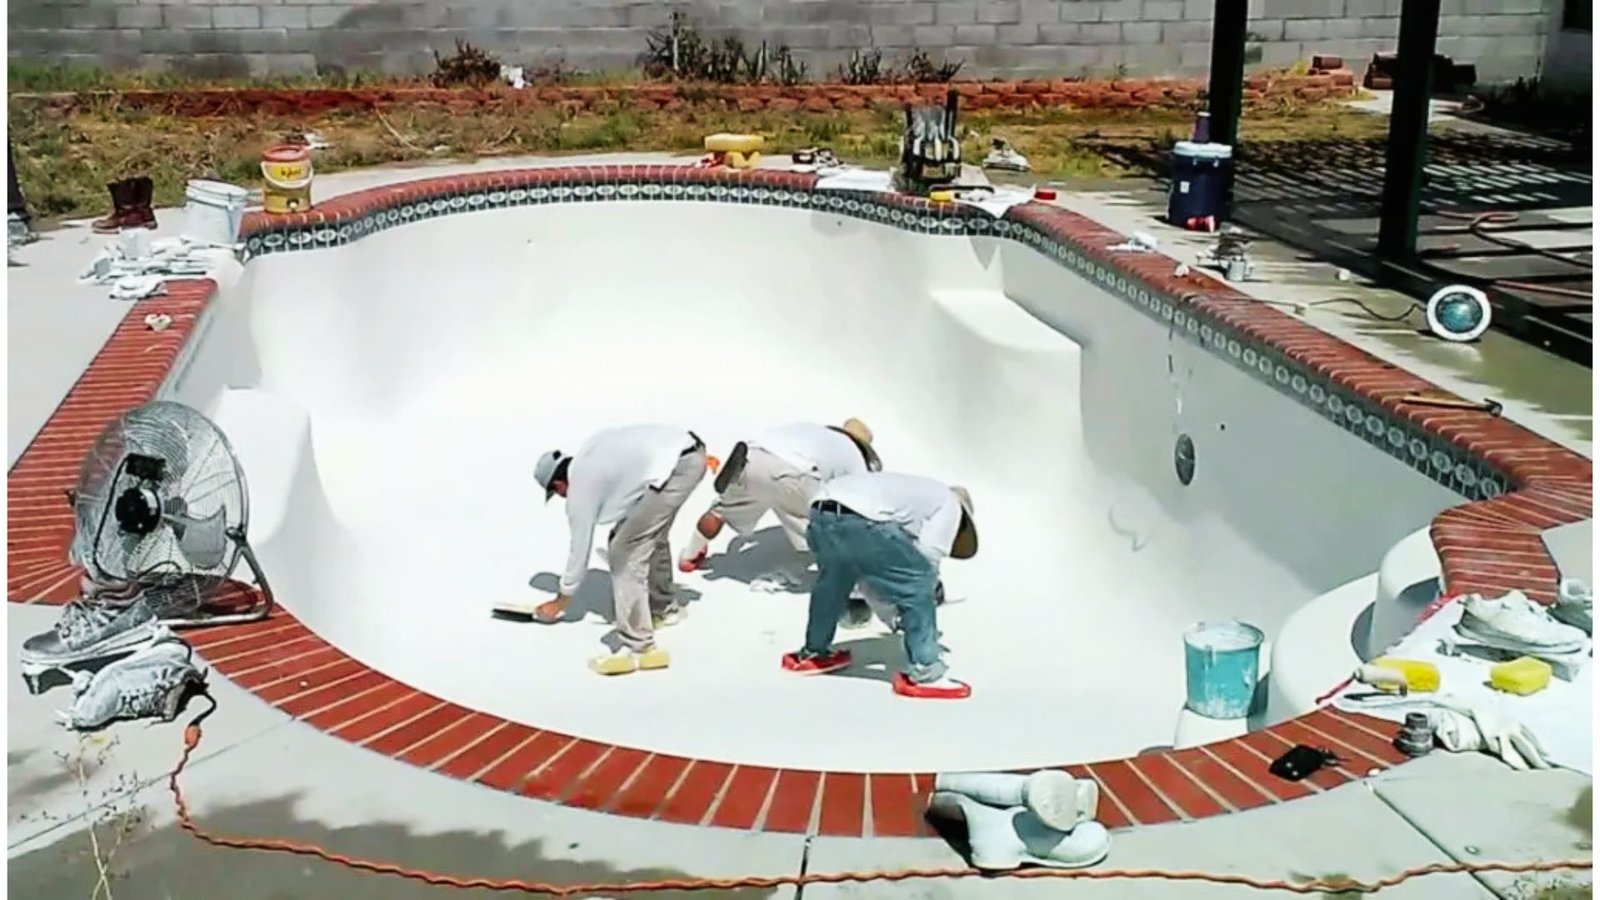
The interior finish is what the pool water touches every day. Common options include plaster, pebble, quartz, or tile surfaces. Each has a different look, feel, and price point.
Workers apply the finish layer by hand or by machine, depending on the material. The surface needs to be smooth and even so it is comfortable for swimmers and easy to clean.
Color choices at this stage affect how the water looks once the pool is filled.
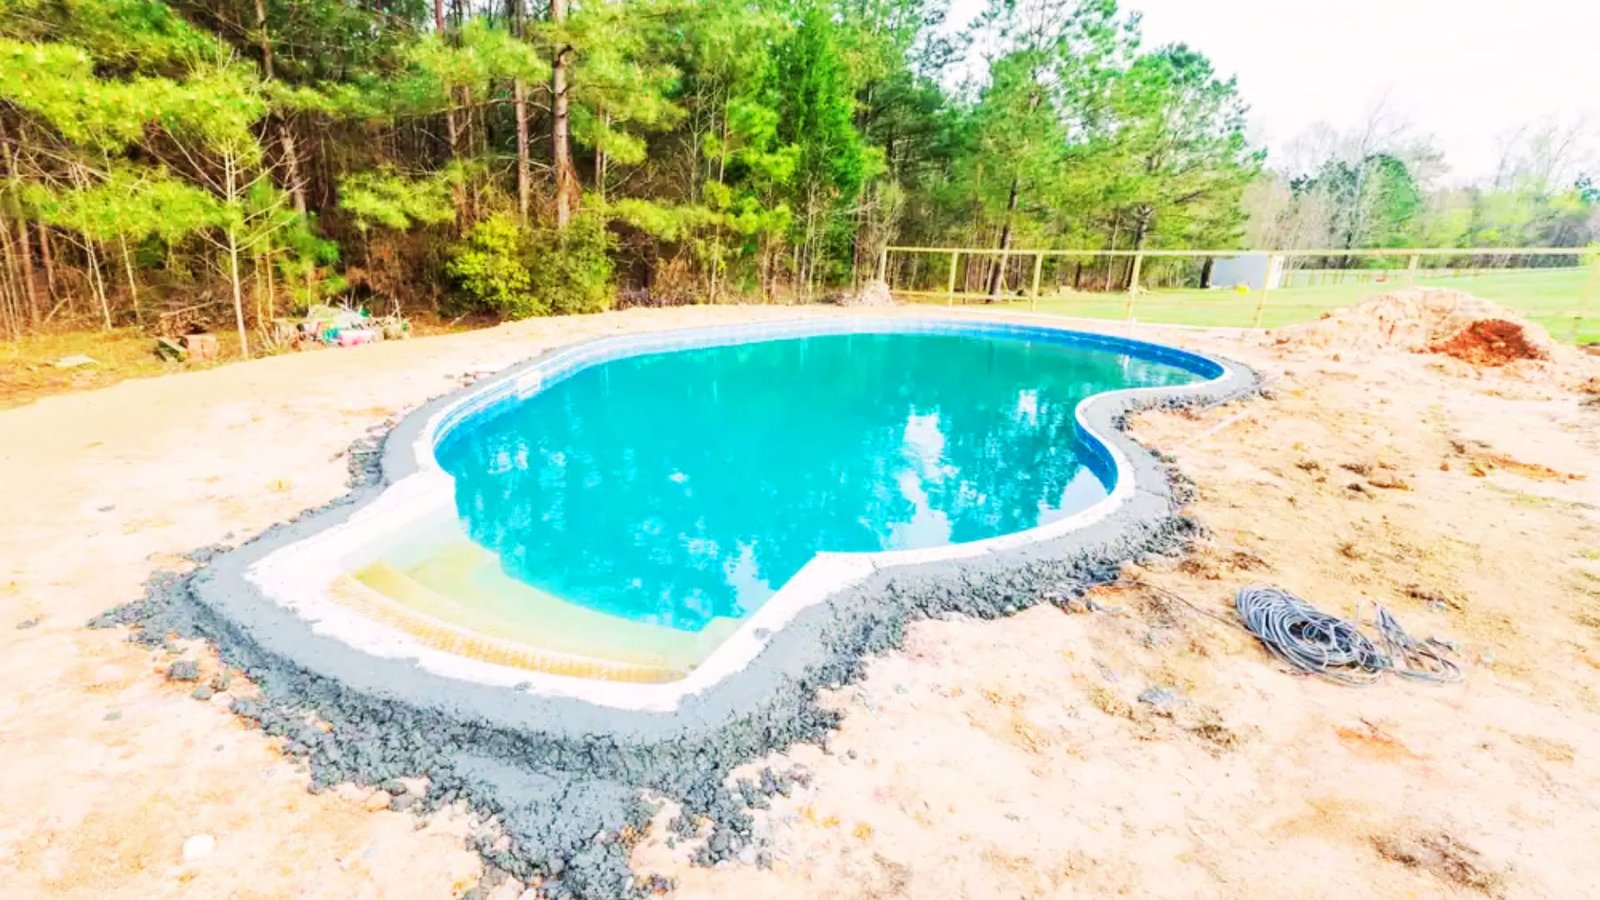
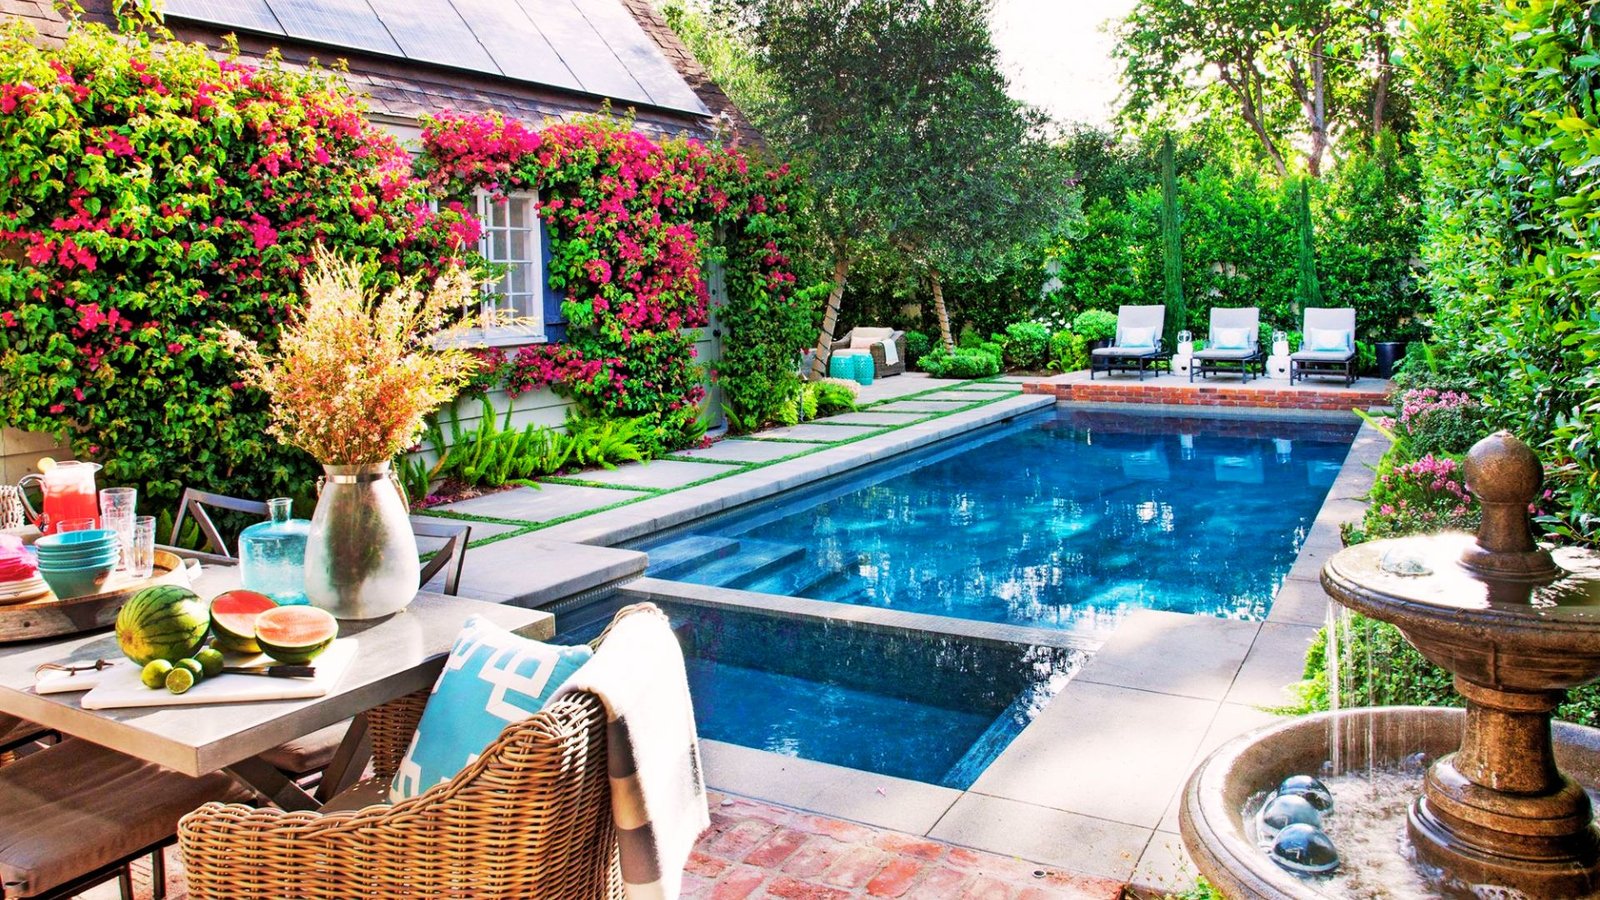
Step 6: Installing Decking and Landscaping
The area around the pool gets just as much attention as the pool itself. Decking materials like concrete, pavers, or natural stone are laid out around the perimeter.
Good decking provides a safe, slip resistant surface for people getting in and out of the water. Landscaping adds plants, lighting, and other features to complete the outdoor space.
This step ties the whole project together visually and functionally.
Step 7: Filling the Pool and Final Testing
With everything in place, the pool is ready to be filled with water. This process can take anywhere from a few hours to a full day, depending on the size of the pool.
Once full, the contractor tests all the systems. Pumps, filters, lights, and chemical levels are all checked and adjusted.
You will receive a walkthrough of how to operate and maintain everything. After a final inspection, the pool is ready to use.
Pool Plumbing and Electrical Systems
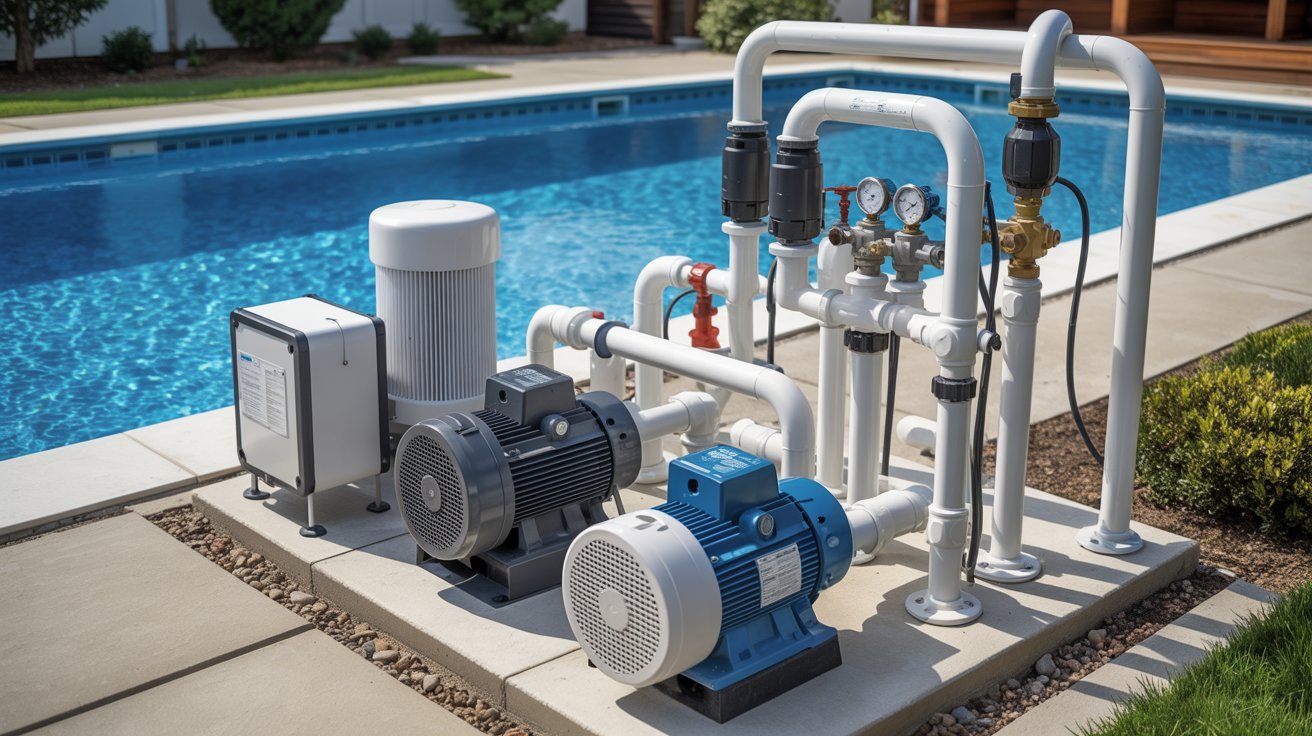
A look at how water flow and electrical components work together to keep your pool running safely and smoothly.
Plumbing Lines and Pressure Testing
Pool pipes move water between the pool, pump, and filter. PVC pipes are the top choice for durability. A pressure test checks for leaks before the deck is poured. Catching issues early saves costly repairs later.
Pool Lighting and Electrical Setup
Good lighting keeps the pool safe after dark. LED lights last longer and use less power. All wiring must follow safety codes and a licensed electrician handles this work.
Pumps, Filters, and Heaters
The pump keeps water moving while filters remove dirt and particles. Variable speed pumps help cut energy costs. Heaters extend your swim season. Gas, heat pump, and solar options are all worth considering based on your budget.
Pool Finishes and Custom Features
Your pool finish and added features shape how the space looks and how long it lasts.
Vinyl, Plaster, or Tile Finishes
Vinyl liners are budget friendly but need replacement every 10 to 15 years. Plaster gives a classic look and is easy to repair. Tile costs more but lasts the longest and stays the cleanest.
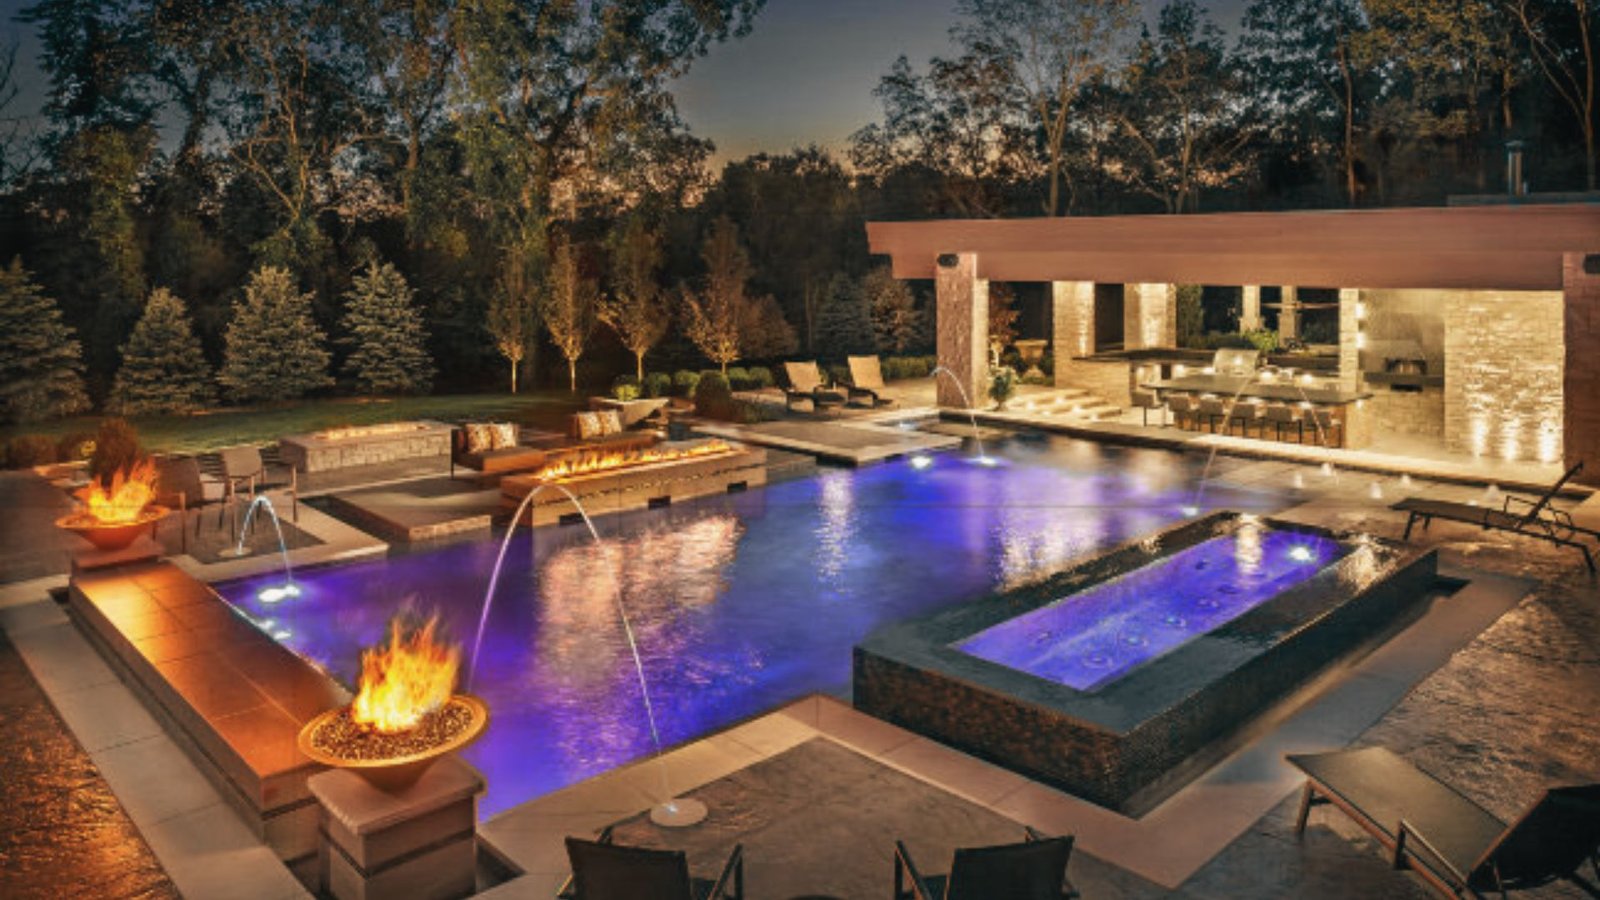
Adding Steps, Benches, and Water Features
Built in steps and benches make the pool safer and more comfortable for everyone. Wide steps help kids and older adults get in and out with ease.
Features like deck jets or small waterfalls add a nice touch without overwhelming your budget.
Pool Decking and Landscaping
Good decking keeps the pool area safe and easy to use. Concrete is affordable while stone and pavers stay cooler in hot weather.
Stick to low maintenance plants and add some lighting to make the space work well into the evening.
Common Inground Pool Construction Mistakes
Small mistakes during pool construction can lead to costly problems down the road.
Skipping Permits and Inspections
Many homeowners skip permits to save time. This can backfire badly.
Without permits, your pool may not meet local safety codes. Some cities can even force you to tear it down. Inspections catch problems early, before they become permanent and expensive.
Always check with your local building department before construction starts.
Poor Plumbing or Drainage Planning
Bad plumbing is hard to fix once the concrete is set. Incorrectly placed pipes cause poor water flow, algae buildup, and uneven chemical distribution.
Drainage around the pool matters too. Poor grading lets rainwater collect near the edges and damage the structure over time. Plan the plumbing layout carefully before construction begins.
Using Low Quality Materials
Cheap materials wear out fast. Low grade plaster, bargain fittings, and poor finishes can crack or peel within just a few years.
You end up paying more in repairs than you would have spent on better materials from the start. Always ask your contractor about the specific materials they plan to use before signing anything.
Tips for a Smooth Inground Pool Construction Project
Building an inground pool takes careful planning. A few smart steps can keep the project on track and within budget.
- Plan the size, shape, and depth before any work begins. Clear plans mean fewer surprises later.
- Set a budget that includes permits, fencing, and equipment. Keep a small buffer for extra costs.
- Pick a contractor with good reviews and verified licenses. The right builder makes a big difference.
- Apply for permits early. Delays in approvals can push back your entire timeline.
- Check in with your contractor regularly. Catching small issues early saves time and money.
Good preparation at the start leads to a smoother build and a pool you can enjoy for years.
Conclusion
I have seen how a little planning early on can make the whole inground pool construction process so much less stressful. When you go in prepared, things just fall into place more naturally.
It is a big project, but it is absolutely worth it when you see the finished result in your own backyard. If you are getting ready to start, take it one step at a time.
Have questions or tips of your own? Drop them in the comments below. We would love to hear from you!
Frequently Asked Questions
How long does inground pool construction usually take?
Most inground pool projects take between 6 to 12 weeks to complete. The timeline depends on weather, soil conditions, and permit approvals.
How much does it cost to build an inground pool?
The cost typically ranges from $35,000 to $100,000 or more depending on size and materials. Always get multiple quotes before making a final decision.
Do I need a permit to build an inground pool?
Yes, most areas require a permit before construction can begin. Check with your local authority early to avoid delays in your project.
What type of inground pool is best for my backyard?
Concrete, fiberglass, and vinyl liner pools are the three main options available. Each has its own price point, maintenance level, and lifespan to consider.
How do I find a reliable pool contractor?
Ask for references, read online reviews, and confirm that the contractor holds proper licenses. A trustworthy builder will always be open to answering your questions upfront.